“Most furniture is not made for people – they are made for the people who sell them.
Laura Huxley.”
How to Build a 4-Hour Chair
Tools
Battery Drill with №2 square-head bit
Hand saw or electric saw
Grinder & sander to shape/smooth the edges
40, 1200 grit and 1200 grit sandpaper
Materials
900 x 900 flat plywood template for legs
100×50 timber scraps – rough sawn looks good
90 mm square head screws
5 mm plywood, leather or whatever for seat base
Seat cushion and back cushion
Begin
- Start with a chair-sized flat piece of plywood
- Remember the cushions determine the chair size
- Cut the arm posts at sitting-arm height (note: be sure to include the armrest when determining the post height. It’s all about fitting your body).
- Cut the back posts at sitting-shoulder height
- Screw the posts (legs) to the plywood template*
- Cut the armrests coffee-cup wide, arm length
- Screw the armrests to the posts. Note: you can add a brace piece under the rear (see photo)
- Make the seat – a square platform to sit on
- Screw the front of the seat to the posts
- Set the seat so the front is knee height
- Place your cushion on it
- Have a strong friend hold the back of the seat
- Sit on it. Friend lifts and lowers until it feels right
- Screw the back of the seat at the feels-right angle
- Do the same with the seat back
- Now put in enough screws to make it strong
- Remove the plywood template
Congrats, you now have a chair
* By screwing the posts (legs) to the template, it ensures the chair will rest flat on the floor, and the legs will not move around while building
How to finish your new chair
- Using 40 grit sandpaper or even a sharp hunting knife, start taking away wood. Round the machined edges, sculpt the lines. 100×50 timber is too blocky.
- Once you are happy with the basic shape, use 120 grit sandpaper to smooth out. If rough-sawn leave the grooves, if you like them.
- Finally sand with 1200 grit wet/dry sandpaper (typically used in auto body finishing). This will give the surface a wonderful feel.
- As for colour, you can leave it to age, you can make furniture polish with olive oil, vinegar and lemon oil, or “pickle” it by taking white latex paint, thinning it to milk like consistency and rub it on. The pigment will penetrate the grain but not obscure the wood. When dry add a coat of water-based varnish.
- For cushions, you probably can find them used, often in discarded sofas. For upholstery, thrift-store leather jackets, saddle blankets, the choices are endless. Find the cushions first and design the chair size to fit them.
That was chair Nº 1 – what’s next?
The first chair will be solid and last a lifetime of rough kids and dogs. The second will go together faster, and more time will be spent decorating it. Carving intricate designs, or use a soldering iron to burn-in lines.
Then, word will spread and folks will come by and ask if they can learn how to build a 4-hour chair. When the chairs get good enough, tourists will hear about them and ask to buy. The workshop will expand with a sales room and eventually go online. The competitive edge will be cost, character and durability.
My Chair № 1 – 25 years later 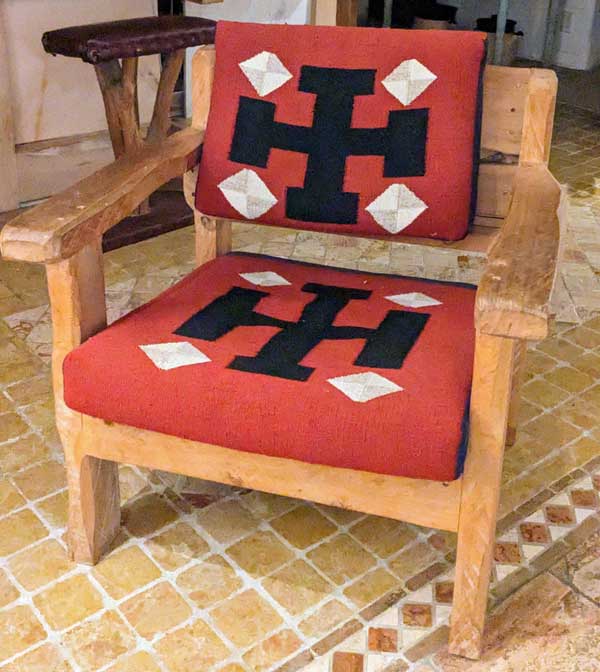

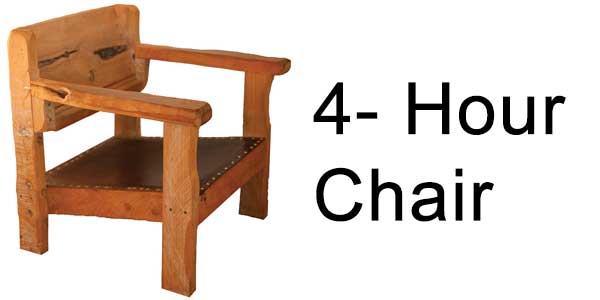
The Four-Hour Chair
As an experiment in working with low income people who would save money building a home, but then incur thousands of dollars in furniture store debt, we made the 4-hour chair – a tutorial for people who had used tools but never made furniture. We then found it was a useful training exercise for everyone.
The challenge in making a chair comes in ensuring that all four legs solidly stand on the floor; that it is comfortable and won’t come loose or fall apart after years of daily use.
Much of the time spent in making a normal chair comes from precise measuring to assure the wood fits together – mastery of the tape measure for precise lengths and protractor for precise angles. This requires years of apprenticeship to get right. We began by tossing out the tape measure and protractor.
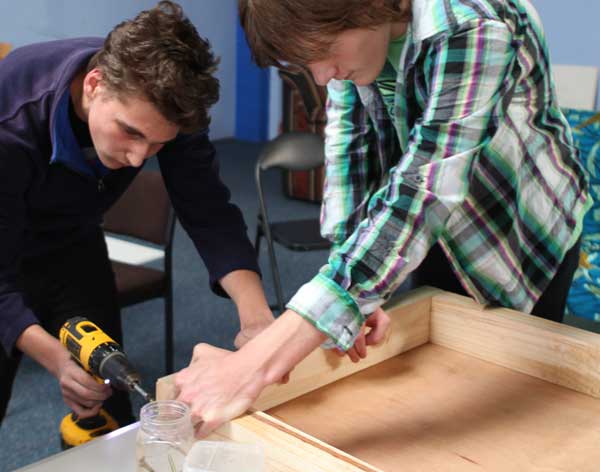
Instead we set out a flat piece of thick plywood upon which the four legs were screwed from the underneath. This assured all four chair legs were cut square and would sit solidly on the floor. The first leg was screwed in, and then the cushion was placed on the board to identify how far apart to place the three other legs. The hardest part, getting it to sit right, became an automatic outcome of a different approach.
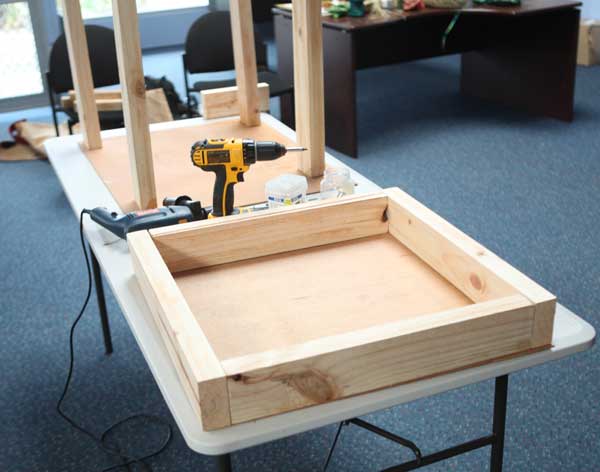
Next the seat frame was made – the size of the cushion, less any overlap on the front. The seat frame was a simple square or rectangle, screwed together with readily available, self-drilling, self-countersinking deck screws which, because of their design, hold firm after years of use. A top was then affixed to the seat frame. The top can be thin plywood, saddle leather, upholstery webbing or rope. No measuring – match the cushion.
The seat frame front was then affixed to the front chair legs with a single strong screw through each leg. For this next step two volunteers were needed. The cushioned seat was rested on stacked boards until the front height felt right, and the front of the seat frame was single-screwed to the front legs at that height to create a pivot point. Then one volunteer carefully sat on the front-fixed cushioned seat while the other (strong) volunteer held and lifted the rear part until the sitter pronounced the angle just right. Then the chair maker screwed in the rear screws, thus fixing the perfect angle. No geometry – fly by seat of your pants.
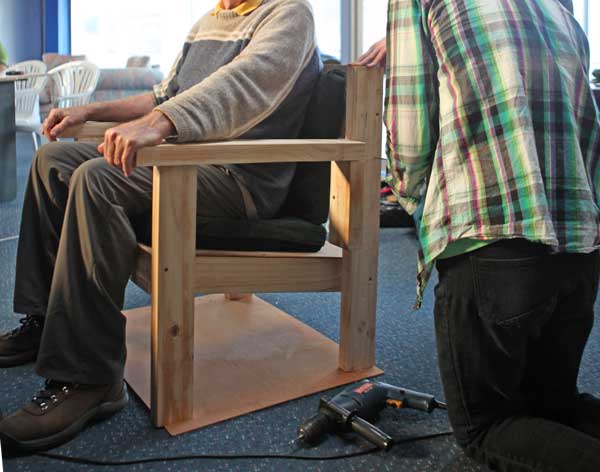
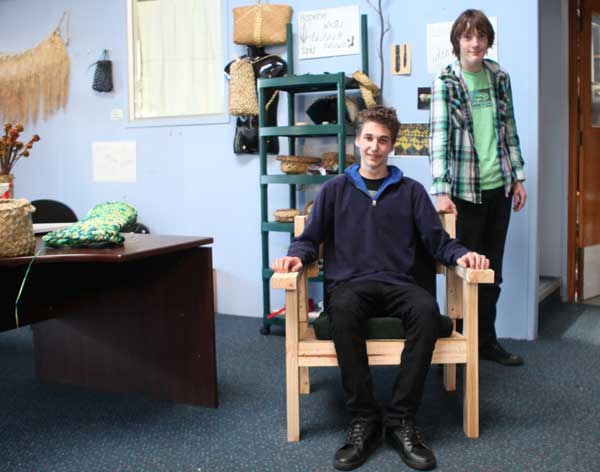
The same process was repeated for the seat back and for setting the arm height to tailor the chair to the body. The first chair took two hours to assemble, and when done, produced a perfectly comfortable, rather ugly and heavy chair made out of 2×4 (50×100) timber. The remaining two hours were then spent with an angle grinder and sander cutting away over 50% of the timber, shaping the square angles into a unified sculpted piece of furniture. Human scaled design – faster, easier, great outcome, wealth produced.
For the academic – Zen and the art of chair making
In the 20th century business schools taught us that two major ways to generate new wealth were:
(1) a shift in technology [case study: IBM] and
(2) organise a disorganised business [case study: McDonalds].

In the case of the 4 hour chair, the shift in technology was the lowly deck screw. A self-countersinking, self-drilling screw with a square head shape to make it harder to strip, it has a very sharp, narrow point, so drilling a pilot hole is unnecessary, especially in soft wood. Its unique shank design means it propels into place with shallower thread to spread out the force, so the screw takes less energy to put in, but is difficult to pull out or work loose over time. After 25 years, the 4-hour chairs are still solid, with no glue, only the screws holding the timber together.
The second way to generating new wealth – organising a disorganised business, is found in the 4 hour chair by abandoning time-consuming skill of pre-cutting wood parts to match up. Grinding then sanding two pieces of wood already fastened to each other is faster, and the best way to determine if an angle is comfortable is to sit on it.
This lesson in chair making has two tangible benefits.
1) It shows how anyone can rapidly master vernacular processes
2) It gives them something to sit on.
Here is another idea for DIY furniture.
- Take a piece of firewood, cut to stool size
- Find a leather jacket at a thrift sore and cut it apart
- (In our stool, we found thicker saddle leather)
- Cut a baseboard and a seatboard
- Cover the baseboard with leather and nail with copper boat nails
- Solidly screw the baseboard to the bottom of the firewood
- Solidly screw the seatboard to the top of the firewood
- Cover the seatboard with some foam to make it softer
- Cover the foam with scrap leather and nail with boat nails.
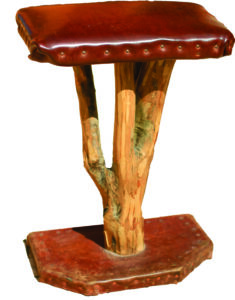
This stool has lasted 25 years and is still as good as new.
